
To record a Microsoft Teams meeting, open the meeting controls and select More actions (…) → Record and transcribe → Start recording, then select Confirm if Teams asks. Everyone in the meeting is notified. To end it, go back to the same menu and select Stop recording. The file is saved to the organizer's OneDrive (regular meetings) or the channel's SharePoint site (channel meetings), and it is linked in the meeting chat and Recap.

Table of contents
- Key takeaways
- Quick reference: Teams recording at a glance
- Before you record: requirements and permissions
- License requirements
- Who can start or stop a recording?
- How organizers control who can record
- How to record a Microsoft Teams meeting on desktop
- Record audio only
- How to record a Teams meeting on mobile (iPhone and Android)
- Recording consent and notifications
- What a Teams recording does and doesn't capture
- Recording vs. transcription vs. captions
- How to stop recording a Teams meeting
- Stop recording vs. Stop transcription
- Does the recording stop if the person who started it leaves?
- Where are Teams meeting recordings saved?
- Find a regular meeting recording
- Find a channel meeting recording
- How to play a recording and turn on captions
- How to share or download a Teams recording
- Share a link
- Download a recording
- No Download button? Check these in order
- How long are Teams recordings kept? (Expiration)
- Check, change, or remove the expiration date
- What happens when a recording expires
- Can't record a Teams meeting? Troubleshooting
- Start recording is missing or grayed out
- Recording stopped but the file is missing
- The link won't open or won't download
- No captions or missing content
- Quick diagnosis table
- Recording a Teams meeting when you're not the organizer
- Check your recording before you rely on it
- FAQ
- Can I record a Teams meeting if I'm not the host?
- Can you record a meeting on the free version of Teams?
- Does Teams notify others when you record?
- Where do Teams recordings go?
- How do I know when my recording will expire?
- Why do I see Stop recording but not Stop transcription?
- Do Teams recordings include live captions?
- Microsoft sources checked
That is the short version. In practice, most "I can't record in Teams" problems come from licenses, roles, and admin policies, not from the button itself. This guide covers who can record, desktop and mobile steps, what a recording does and doesn't capture, where files go, how to share, download, and caption them, the 120-day expiration rule, and what to do if you're a guest or don't see the option at all.
It applies to Teams for work or school (Microsoft 365 / Office 365). The steps were checked against Microsoft Support and Microsoft Learn in September 2026. Menu names can vary slightly by app version, license, and tenant settings.
Key takeaways
Start: More actions → Record and transcribe → Start recording. Stop: same menu → Stop recording. One person recording is enough for the whole meeting.
You need an eligible Microsoft 365 business, enterprise, or education license and a meeting policy that allows cloud recording. Guests, anonymous users, and people from other organizations can't start a native recording.
Regular meetings are saved to the organizer's OneDrive; channel meetings to the channel's SharePoint site.
Recordings expire after 120 days by default (30 days max default for A1 users), unless your admin or the file owner changes it.
Recordings don't capture whiteboards, annotations, shared notes, app-shared content, or more than four video streams at once.
Quick reference: Teams recording at a glance
| What you want to do | Where to go |
|---|---|
| Start recording | More actions → Record and transcribe → Start recording → Confirm |
| Record audio only | Start recording → More options → Choose what to record → Audio only |
| Stop recording | More actions → Record and transcribe → Stop recording |
| Find a regular (non-channel) meeting recording | Meeting chat, or Calendar → meeting → Recap |
| Find a channel meeting recording | The channel → Shared or Files tab |
| Turn on captions during playback | Toggle captions or Alt+C; use Watch in browser if missing |
Before you record: requirements and permissions
Being in the meeting, or even presenting, doesn't guarantee you can record it. Recording permission is also separate from the right to view, share, or download the file afterward.
License requirements
Per Microsoft Support, recording in Teams for work or school requires one of these licenses: Office 365 Enterprise E1, E3, E5, or F3; Microsoft 365 Business Basic, Standard, or Premium; or Microsoft 365 A1, A3, or A5. Your admin must also leave Meeting recording turned on in the meeting policy assigned to you (the PowerShell setting is AllowCloudRecording). Microsoft's admin docs note that both the organizer and the person starting the recording need recording permission.
The free version of Teams doesn't include meeting recording. Teams for personal use can record only if you have a Microsoft 365 Personal, Family, or Premium subscription; those recordings appear in the meeting chat and expire after 30 days unless you download them.
Who can start or stop a recording?
| Participant type | Can start/stop recording? |
|---|---|
| Meeting organizer | Yes, if license and policy allow |
| Co-organizers and other people from the same organization | Yes by default, if license and policy allow and the organizer hasn't restricted it |
| People from a different organization (external) | No |
| Guests | No |
| Anonymous participants | No |
The presenter role and recording permission are two different things. An outside consultant invited as a presenter can share their screen but still can't start the recording, because their account belongs to another organization. The practical fix is to ask an internal organizer or co-organizer to start it.
How organizers control who can record
Organizers with a Teams Premium license can restrict recording in meeting options:
Open Calendar and select the meeting.
Select Options (or Meeting options, depending on your version).
Find Recording & transcription.
Set Who can record and transcribe to Organizers and co-organizers, Organizers, co-organizers, and presenters, or the options your tenant offers.
Meeting options can't override a tenant policy that blocks recording. Two other admin settings commonly trip people up: if an organizer turns off Copilot for a meeting, recording and transcription are turned off too, and a policy can require attendees to explicitly agree to be recorded before they can unmute or turn on their camera.
How to record a Microsoft Teams meeting on desktop

Start or join the meeting in the Teams desktop app.
In the meeting controls, select More actions (the three dots).
Select Record and transcribe → Start recording.
Select Confirm if prompted.
Then confirm it's actually running: a recording indicator appears at the top of the meeting window, participants get a notification banner, and the menu now shows Stop recording. A live transcript on screen isn't proof that a recording is running; transcription and recording are separate processes.
Record audio only
Select More actions → Record and transcribe → Start recording.
In the dialog, select More options.
Under Choose what to record, select Audio only.
Select Confirm.
Audio only gives you sound, not text. If you need a searchable record, turn on transcription as well (see our guide to meeting transcripts). If you don't see the Audio only option, your app version or tenant configuration may not support it yet.
How to record a Teams meeting on mobile (iPhone and Android)
Join the meeting in the Teams mobile app.
Tap More actions (the three dots) in the meeting controls.
Tap Start recording (on some versions it sits under Record and transcribe).
To stop, tap More actions → Stop recording.
The same license and policy rules apply on mobile. The recording is still saved to OneDrive or SharePoint, not to your phone.
Recording consent and notifications
Teams notifies everyone when recording starts, but the banner doesn't automatically satisfy every legal consent requirement. In the US, about a dozen states (including California, Florida, Illinois, Maryland, Massachusetts, Pennsylvania, and Washington) require consent from all parties, and the GDPR applies to participants in the EU. Say at the start of the meeting that you're recording and why, follow your company policy, and get legal advice for sensitive cases.
What a Teams recording does and doesn't capture
A standard recording captures audio, participant video, and screen sharing, laid out according to Teams' recording format. It isn't a copy of what each person saw on their own screen.
| Content | Captured? |
|---|---|
| Meeting audio | Yes (the only content in Audio only mode) |
| Participant video | Yes, but no more than four video streams at once |
| Screen sharing | Yes |
| Whiteboard and annotations | No |
| Shared notes | No |
| Content shared by apps | No |
| Videos and animations embedded in PowerPoint Live | No |
The four-stream limit is a recording limit, not a cap on meeting size. And the PowerPoint Live limitation applies to embedded video and animations, not to slides in general. For a training session that relies on a whiteboard or an embedded demo video, share the source files alongside the recording.
Recording vs. transcription vs. captions
| Feature | What it is | Common mix-up |
|---|---|---|
| Recording | Audio/video file to replay | It isn't a transcript |
| Transcription | Speaker-labeled text generated from speech | A separate file with its own permissions and policies |
| Live captions | Real-time subtitles during the meeting | Not burned into the recorded video |
| Playback captions | A caption track you toggle in the player | Not embedded in a downloaded MP4 by default |
If you need a written record, see how to write meeting minutes or turn the transcript into a summary with an AI meeting notes tool.
How to stop recording a Teams meeting
Select More actions → Record and transcribe.
Select Stop recording.
Confirm if a dialog appears, then check that the recording indicator is gone.
 Try NoteMeeting Free →
Summarize your meetings & videos automatically with NoteMeeting
Google Meet, Zoom, YouTube, Podcast — all in one extension.
Stop recording vs. Stop transcription
| Command | Result |
|---|---|
| Stop recording | Stops the recording and the live transcription |
| Stop transcription | Stops only the transcript; the recording keeps running |
Does the recording stop if the person who started it leaves?
No. The recording continues after the person who started it leaves, and the organizer doesn't need to be present. It stops automatically once everyone has left. If someone forgets to leave, Teams ends the recording and restarts it every four hours, so a very long meeting can produce several files. If you need it to stop at a specific moment, use Stop recording rather than just leaving.
Where are Teams meeting recordings saved?
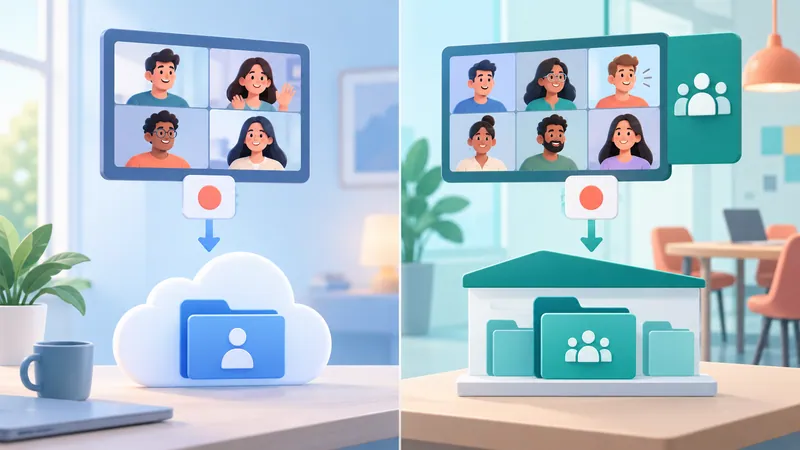
After you stop recording, Teams processes the file, which can take a little while for long meetings; the recording then appears in the meeting chat. Where it lands depends on the meeting type:
| Meeting type | Where the file lives | Easiest place to open it |
|---|---|---|
| Regular (non-channel) meeting | Recordings folder in the organizer's OneDrive, no matter who started the recording | Meeting chat, or Calendar → meeting → Recap |
| Channel meeting | Recordings folder in the channel's SharePoint site | The channel's Shared or Files tab |
Chat, Recap, and the channel tabs are shortcuts; OneDrive and SharePoint are the actual storage. Recordings also show up in Microsoft 365 lists such as Shared with me and Recent, and Microsoft 365 Search indexes them.
Find a regular meeting recording
Go to Chat and open the meeting chat.
Open the Shared tab (or find the recording card in the conversation).
Select the recording and then Play.
Or open Calendar, select the past meeting, open Recap, and play it from there. Organizers can also check the Recordings folder in their OneDrive.
Find a channel meeting recording
Open the team and channel.
Go to Shared or Files.
Look for the
.mp4file by meeting name and date, then play it.
Search by meeting name and date rather than file extension, especially if you have many meetings or recorded audio only. Being able to see a channel doesn't mean you have every permission on its recordings.
How to play a recording and turn on captions
Open the recording from chat, Recap, or the channel and select Play. For the full Microsoft 365 web player, choose Watch in browser.
To show captions that already exist:
Hover over the player.
Select Toggle captions or press
Alt+C.If there's no caption option, select Watch in browser.
If no captions exist and you have permission, go to Video Settings → Transcript and captions → Generate. Generation takes a few minutes depending on video length; once done, the button changes to Translate. Toggle captions only shows or hides an existing track; Generate creates one. You can also adjust caption size and color under Playback options → Caption settings.
Turning on live captions during the meeting doesn't mean the downloaded file will have text on screen. Playback captions are a player layer, so missing text in a downloaded MP4 doesn't mean the file is broken.
How to share or download a Teams recording
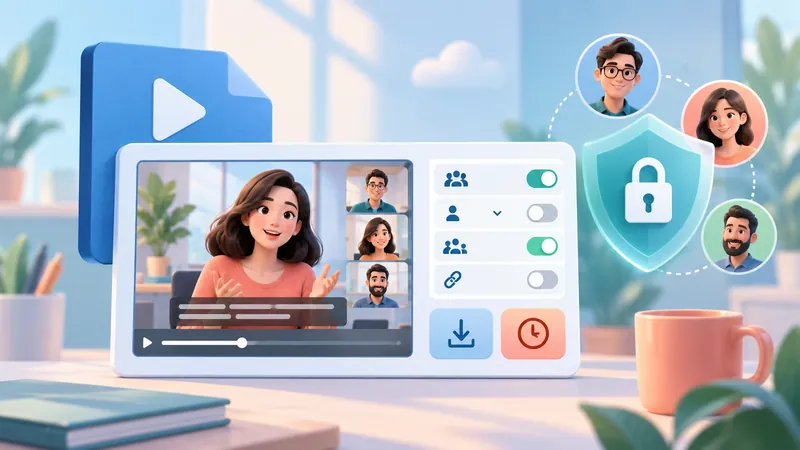
Having a link, being able to view, and being able to download are three different states. People invited to the meeting can view the recording by default; guests and external attendees can view it only if it's explicitly shared with them.
Share a link
Open the Shared tab in the meeting chat (or the channel's Files tab).
Hover over the recording and select More options → Copy link.
Check who the link works for and adjust access in the link settings.
Send it. If the recipient can't open it, check their account and permissions instead of resending the same link.
Example: you send a recording link to a client outside your company and they get an access error. The file owner needs to grant that client access in OneDrive (if your organization allows external sharing), and the client must sign in with that exact account. If your tenant blocks external sharing, go through IT rather than creating a workaround public link.
Download a recording
Open Shared or Files.
Select the recording, then More options → Download.
For regular meetings, Microsoft Support states that only the organizer can download the recording. For channel meetings, the file follows the channel's SharePoint permissions, and admins can block downloads with the ChannelRecordingDownload policy. When it's set to Block, recordings go to a Recordings\View only folder where channel owners have full rights and members can only view.
No Download button? Check these in order
Are you signed in with the right account, on the right file?
Is it a channel meeting or a regular meeting?
Is the file in OneDrive or SharePoint?
What role and file permissions do you have?
Does an org policy block downloads?
Can the owner or organizer grant you more access within policy?
How long are Teams recordings kept? (Expiration)
Teams recordings and transcripts expire after 120 days by default. Admins can set any value from 1 to 99,999 days, or turn off auto-expiration entirely. For A1 (education) users, the maximum default is 30 days. Changes to the admin default only apply to new recordings.
The 120 days is a default, not a guarantee. To see what applies to a specific file, check the expiration date shown on that recording.
Check, change, or remove the expiration date
Open the recording from chat, Recap, or its storage location (use Watch in browser if needed).
Find the expiration info under the video.
If you have edit rights, pick a new date or select Remove expiration.
Confirm the new date is displayed.
Organizers can usually change expiration on their recordings; view-only users can't.
What happens when a recording expires
Expired recordings move to the recycle bin of the OneDrive or SharePoint site where they were stored. For work or school accounts, recycle bin items are permanently deleted after 93 days unless your admin changed that setting. Ask the owner to restore it as soon as possible; once purged, it can't be recovered. A restored recording no longer expires automatically.
Expiration is a storage-management feature. It doesn't replace your organization's retention policies or record-keeping obligations, and removing expiration doesn't mean the file can never be deleted.
Can't record a Teams meeting? Troubleshooting
Start recording is missing or grayed out
Account type: are you a guest, anonymous, or from another organization?
License: do you have one of the eligible Microsoft 365 licenses listed above?
Meeting options: has the organizer limited Who can record and transcribe?
Policy: ask IT to check that Meeting recording is on in your meeting policy, and that Copilot wasn't turned off for this meeting.
Recording stopped but the file is missing
Give Teams time to process it, especially for long meetings.
Regular meeting: check chat, Recap, and the organizer's OneDrive Recordings folder.
Channel meeting: check the channel's Shared/Files tab and SharePoint site.
Check that you're signed in with an account that has access. Guests may need the file shared directly.
If it's still missing, ask the organizer or IT.
The link won't open or won't download
Won't open: wrong account, wrong file, no view permission, file deleted or expired, or external sharing blocked. Opens but won't download: file permissions, meeting type, storage location, or a download-blocking policy.
No captions or missing content
For captions, try Toggle captions, then Watch in browser, then Generate if you have rights. For missing content, check whether it was a whiteboard, annotation, shared note, app content, or PowerPoint Live video, or whether more than four video streams were on screen. Share the source material separately.
Quick diagnosis table
| Symptom | Check first | Next step |
|---|---|---|
| No Start recording | Account type, license, meeting options, policy | Ask the organizer or IT |
| No file after stopping | Still processing, meeting type, wrong location | Check chat/Recap/OneDrive or channel/SharePoint |
| Link won't open | Wrong account, no access, expired file | Owner checks and grants access |
| Viewable but no Download | File rights or download policy | Check with the owner or IT |
| No captions | Not toggled, not generated, no permission | Watch in browser, then Generate |
| Missing presentation content | Unsupported content type or stream limit | Share the source files |
Recording a Teams meeting when you're not the organizer
If you're a guest, external participant, or your license doesn't allow recording, you have three legitimate options:
Ask an internal participant to record. Anyone from the host organization with recording rights can start it, and the file goes to the organizer's OneDrive. Then ask them to share it with you.
Use a screen recorder on your device. On Windows, the Snipping Tool and Xbox Game Bar can record your screen; OBS Studio is a free option on Windows and Mac. See our step-by-step for screen recording with audio, which uses the same tools. Capturing system audio on a Mac usually needs extra setup.
Use an AI note taker if your organization permits it. Many join as a bot or capture audio locally and produce a transcript and summary. Compare options in our roundup of the best AI meeting note takers.
Whichever you choose, tell participants you're recording. Local screen recordings don't trigger the Teams recording notice, so the consent obligation is on you.
Check your recording before you rely on it
Before you send a recording to others or treat it as an official record, open it and skim the key sections, confirm the recipients' access and download rights, and check the expiration date. If something fails, give the organizer or IT these details: your account type, your meeting role, whether it was a channel meeting, where you looked, and the exact error or missing option. That narrows the cause much faster than "Teams won't record."
Once you have the transcript, see how to get the most from a meeting transcript, or use an AI transcript summarizer to turn it into notes and action items.
FAQ
Can I record a Teams meeting if I'm not the host?
Yes, if you're in the same organization as the organizer, have an eligible license, and your meeting policy and the meeting options allow it. Guests, anonymous users, and people from other organizations can't start a native Teams recording.
Can you record a meeting on the free version of Teams?
No. The free version doesn't include recording. Teams for personal use can record with a Microsoft 365 Personal, Family, or Premium subscription, and those recordings expire after 30 days unless downloaded.
Does Teams notify others when you record?
Yes. Everyone in the meeting sees a notification when recording starts, and a recording indicator stays visible. Third-party screen recorders don't trigger this notice.
Where do Teams recordings go?
Regular meetings go to the Recordings folder in the organizer's OneDrive. Channel meetings go to the Recordings folder in the channel's SharePoint site. Both are linked from the meeting chat or channel.
How do I know when my recording will expire?
Open the recording and look for the expiration date under the video. If you have edit rights, you can change the date or remove expiration there.
Why do I see Stop recording but not Stop transcription?
Stop recording ends both the recording and the live transcription, so you don't need both. Use Stop transcription only when you want to end the transcript but keep recording.
Do Teams recordings include live captions?
No. Live captions aren't burned into the video. During playback, use Toggle captions or Alt+C, or generate captions in the web player if none exist.
Microsoft sources checked
Play, share, and download meeting recordings in Microsoft Teams
Manage meeting and call recordings in Teams for personal use
Reviewed September 2026 for Microsoft 365 work and school accounts. Menus and permissions can differ by tenant.